How to Install a Grow Light
By this point, you will probably have your grow tent erected and got the extraction system installed.
The next step is to install the grow light.
If the grow light is of the LED variety, then it will normally consist of just the LED unit and little else. However, if the grow light is an HPS or CDM then it will consist of a ballast, a reflector, and a lamp. With one of our Essentials Kits you will usually get a pair of easy rolls
No matter which type of grow light you want to install, you will want to mount the main part of the light centrally inside the tent, (or its half of a larger tent) so that it gives the best coverage.
For an HPS or CDM Grow Light:
As previously mentioned, this will comprise of a ballast, a reflector, and a lamp.
To begin with, we'll look at installing the lamp in the reflector. It is easiest to do this before hanging the reflector up. First of all, lay the reflector on its back so that you can see the lamp holder. Most reflectors have a plastic protective covering on the reflective surface. This must be peeled off before going any further. Under no circumstances use the reflector with the protective plastic layer on as it will both drastically reduce the reflectivity and will, in all possibility, melt off and then land on the lamp which will ruin it.
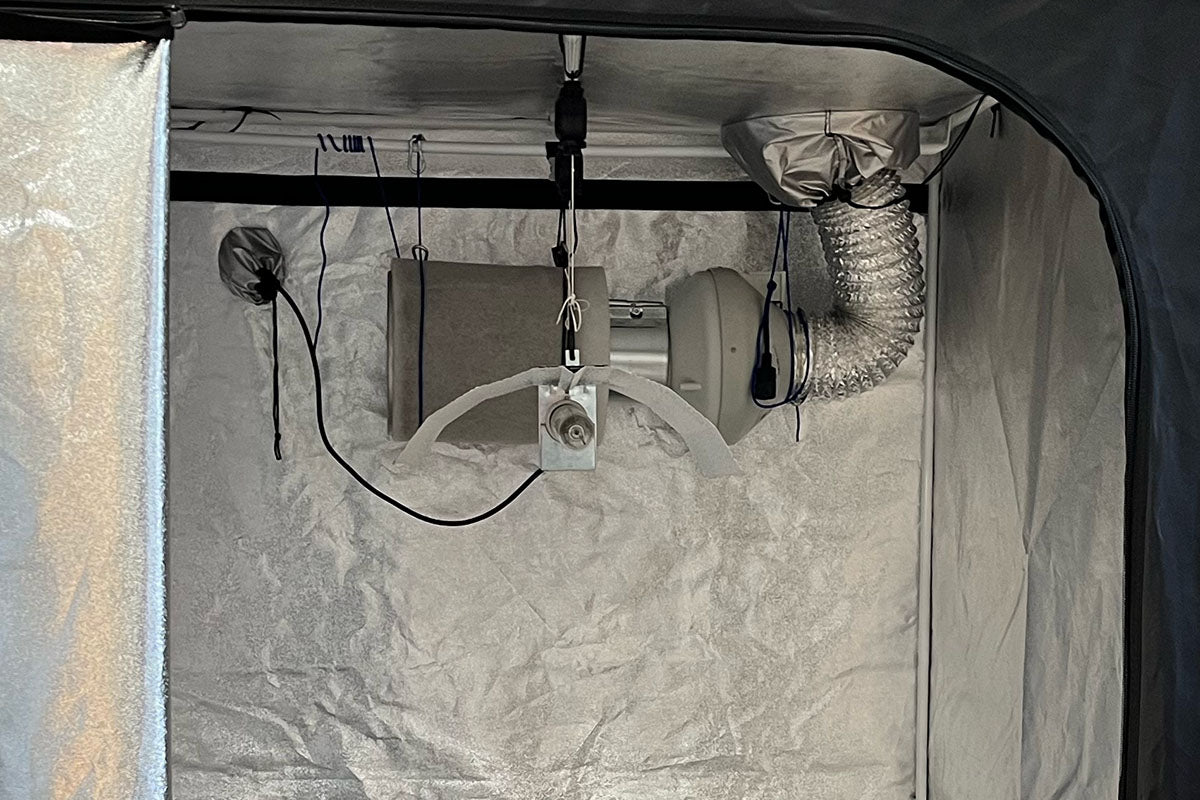
Hanging the Reflector
The lamp can now be hung from the hanging rail running centrally from the front to the back of the tent. For this use the easy rolls. Attach them to the hanging rail with cable ties or similar. The spring loaded reel of line can then be pulled down and tied to the hanging points on the reflector.
The reflector should be able to be lowered with a pull or raised with a lift. It should then stay where it has been placed.
If it does not then it may be necessary to adjust the tension clutch on the easy rolls.
This is done by turning the wing nut on the sides of them. If the reflector will not stay down then turn the clutch(es) clockwise to increase the tension. If the tension is too high and the reflector cannot be lowered, or only lowered with difficulty then turn the wingnut anticlockwise a little to reduce the tension.
The reflector will have a cable with a plug on the end of it. This needs to be plugged into the socket on the ballast. If possible, the ballast should be placed outside of the grow tent.
Ballasts, particularly magnetic core and coil types, produce heat which is usually best kept out of the tent if possible. Wherever it is located, make sure it is placed on a flat, firm surface such as a table, or hung on a wall. Do not place it on carpet as this will not allow it to dissipate heat from the bottom. Also, for safety's sake, don't place it on or next to anything combustible.
Once the reflector has been plugged into the ballast, the ballast will need to be plugged into the heavy duty timer, which in turn will need to be plugged into a mains outlet socket. Before plugging it all in, it is a good idea to set up the timer. Read below for how to do this.
Remember, it's really important to stay on top of your cable management to avoid tangles and any annoyances when moving in and out of your grow room.
Use cable ties to hold your reflector wires out the way, and tuck your cables down the side of your tent and out of an exhaust sock.
Finally, we will install the lamp. We recommend that you get a clean, lint free cloth for handling the lamp to avoid getting fingerprints on it. At a push, tissue paper can be used to avoid touching the glass directly. Take the lamp out of the box by gripping the non-glass (the metal threaded or ceramic bayonet) end. The cloth or tissue held in the other hand can then be used to grip the glass.
For an HPS lamp, Push the threaded end into the lamp holder on the reflector. Turn the lamp clockwise several turns until it will turn no more. It is very important that the lamp is turned as much as possible. If the lamp is not inserted fully and firmly into the lamp holder then the centre contact inside the holder will not make a very good contact. This can lead to electrical arcing which will usually cause irreparable damage to the solder contact on the bottom of the lamp.
For a CDM lamp, you will notice that there are 2 pins on the bottom of the ceramic base. One of these pins has a small circular ring on it. The other pin has a larger ring on it. The lamp holder has 2 holes in the bottom. One has a small hole, the other has a large hole. This arrangement ensures that the lamp can only be inserted the correct way around. Insert the lamp so that the pin with the large ring aligns with the large hole in the bottom of the lamp-holder, and that the pin with the small ring on it aligns with the small hole on the bottom of the lamp holder. Once they have been located and inserted into the correct holes, the lamp can be turned about a quarter turn to lock in place. Again, the lamp needs to be located firmly by being turned until it can go no further.
Programming the Timer
Lift up the hinged protective cover over the clock face. Turn the clock face clockwise until the current time lines up with the arrow in the middle. Next, select the times that you want the light to be on for by pushing the segments out towards the outside, away from the centre. Each segment represents 15 minutes. Usually, you will want the light to be on for a block of time - e.g. from 19:00 (which is 7pm) through to 7:00 (7am). To program this simply push out all the segments from 19:00 and 6:45, leaving the one at 7:00 in the inner (off) position. This way, when the clock reaches 19:00 it will switch the light on, and when it reaches 7:00 it will switch the light off.
The timer can now plugged into the mains outlet socket and the ballast can be plugged into the front of it. One thing to note - if there is a power cut, the current time on the timer will need to be set again.
Once that has all been done, your grow light is set up and ready to be used.