In our blog article, "Seeds or cuttings? Which is best?" we discussed the pros and cons of each of the 2 ways of starting to grow to help you decide which way to go.
In this article we will be looking at how to grow from cuttings, and the different ways of producing rooted clones which are ready to move on to the vegetative stage.
Why Take Cuttings?
The idea behind taking cuttings is that we take an adult plant (called a mother plant) that has particular characteristics that we like, such as growth pattern, vigor, taste, yield, hardiness and disease resistance. We can then literally make copies by taking cuttings, with each cutting we take, producing plants which all have identical genetics as the mother plant. These exact genetic copies are called clones and will grow exactly like the mother plant.
This means that as long as we keep the mother plant alive and healthy, we can produce as many of these exact copies of it as we like, time and time again. The advantages to this are numerous. It enables the grower to really get to know just how that particular plant grows, what it likes and its dislikes etc. and also what to expect in terms of yield and crop quality.
This is often referred to getting your grow "dialled in". Using cuttings also cuts down on the expense of purchasing seeds for every grow and you always know how to get the most out of your grow with one particular plant. Evoponic MotherKare can help get the most from your mother plant and keep it healthy.
The Basics of Taking Cuttings
In a nutshell, part of the side shoots on the mother plant are cut off and placed in an appropriate environment and encouraged to grow roots of their own from the cut end. Given the right conditions, cuttings will do this naturally because it is one of the ways that plants can propagate themselves in nature.
The mother plant needs to be large enough to be able to provide you with at least as many side shoots for the number of cuttings as you will need. Sometimes, a few cuttings will fail to take root. This is quite normal and can be caused by a variety of different reasons.
Perhaps the stem wasn't thick enough, or maybe the cutting was suffering from a deficiency or a pest or disease infection. For this reason it is a good idea to take a few more cuttings than you will actually need. Also, sometimes some cuttings are just plain stubborn and they will seem to refuse to take root.
A mother plant can be encouraged to produce side shoots (rather than concentrating on growing vertically) by "topping" which is literally snipping off the tops of the tallest part(s) of the plant. This is normally done by cutting the stalk just below the top set of leaves.
By removing the tops the plant will grow the side-shoots for a while, rather than growing vertically. The side-shoots can then be used to create clones. The technicalities of how to keep a mother plant healthy and productive will be a topic of another exciting article, but as mentioned before Evoponic MotherKare can help a lot.
The Basics of Propagation and the Equipment you Will Need
First, we need to decide what method of cloning we are going to use, then we can then get the necessary equipment together and prepared before cutting parts off the mother plant. It is important to make this process as quick and smooth as possible.
This is because once a cutting has been separated from its parent plant it has no roots from which to draw up water. Therefore, once cut, we need to make sure that the cuttings do not lose much water through their leaves, otherwise they could end up drying out and dying before roots have had a chance to develop. Having everything to hand before beginning ensures that the time between being cut off and being put into their new environment is as short as possible.
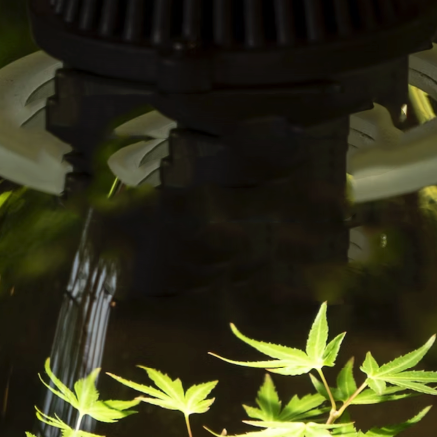
The easiest way to give clones the right environment is to use a propagator.
A propagator is a basically a box with a clear lid and closable vent holes on the top. With little air exchange or movement inside, a propagator maintains a high humidity level around the cuttings. The high humidity keeps their water loss is reduced down to almost zero. This means the cuttings will remain hydrated and alive until they grow their own roots and can support themselves independently.
There are 3 main types of propagator, coming in a variety of sizes and designs to suit every grower:
The choice of propagator and type of rooting plug you choose is generally one of personal choice. However, many growers will "match" the rooting plug to the intended medium that they will eventually grow the plants in. There are 3 main types of plug to choose from. There are Soil Plugs, Rockwool and Root!it Propagation Plugs which are made from a natural substance called Fleximix.
Usually, a tray of these moistened plugs sit at the bottom of the propagator and the cuttings are placed into the holes in the centre of them. The choice of whether to use a heated propagator or an unheated one is very much up to the user and the environment in which it will be situated.
If the propagator is going to be situated in a cold environment, then a heated propagator will help to speed up the rooting process. If the propagator is going to be situated in a warm environment, then a heated propagator may not be necessary.
Going Aeroponic
Aeroponic propagators work slightly differently. There are no plugs. The stems of the cuttings are placed into a spongy rings made of a substance called neoprene:
The soft collars grip the cutting around the stem without damaging it. The neoprene ring then sits inside a small net pot which can be filled with clay pebbles. A special top-tray, which holds several collared cuttings sits above a reservoir, filled with pH adjusted water (pH of around 5.8).
The aeroponic propagator has a method of "spraying" the lower portion of the cuttings with the water. The method of spraying is usually achieved through the use of spray heads which are attached to a small water pump.
The spray of water lands on the net pots keeping the clay pebbles and the stem of the cutting moist. The great advantage to this is that as the spray or mist travels through the air it becomes very highly oxygenated. The highly oxygenated water helps to keep the stems healthy and encourages faster root development than just placing cuttings into plugs.
The first aeroponic propagators simply used an air pump and air stones to bubble air into the reservoir. When the bubbles reach the surface, they "pop" and release a fine mist of water upwards which then wets the lower portion of the cuttings' stems. However, using a pump and spray head is a more reliable and efficient method.
If you decide that the aeroponic route is not for you then using rooting plugs is a fine alternative. You can use any of the types mentioned above (fleximix, rockwool or peat plugs). These often come in a tray which can be placed in the bottom of the propagator.
The tray keeps the plugs upright and slightly spaced apart. It is worth mentioning that at almost 100% humidity, the inside of a propagator creates almost ideal conditions for mould growth. Cuttings that contract a fungal disease such as a Powdery Mildew infection will have a tougher time later in life. Using Biobizz Leaf Coat, coats the cutting with a film of breathable latex which stops fungal spores getting to the cutting and reduces water loss. The coat will dissolve after 2-3 days so it will need to be reapplied regularly.
Fungal infections are usually systemic (live inside the plant and not just on the outside). As the disease infiltrates the plant it will never have the same vigour or be as productive as it could have been. To minimise the chance of a fungal or bacterial infection taking hold on your cuttings, all your equipment, and especially the propagator, should be scrupulously clean and preferably sterilised before use.
Get Everything Together Before Starting
Apart from a propagator and your choice of plugs, you will generally need the following
- A healthy mother plant with an adequate number of thick side-shoots
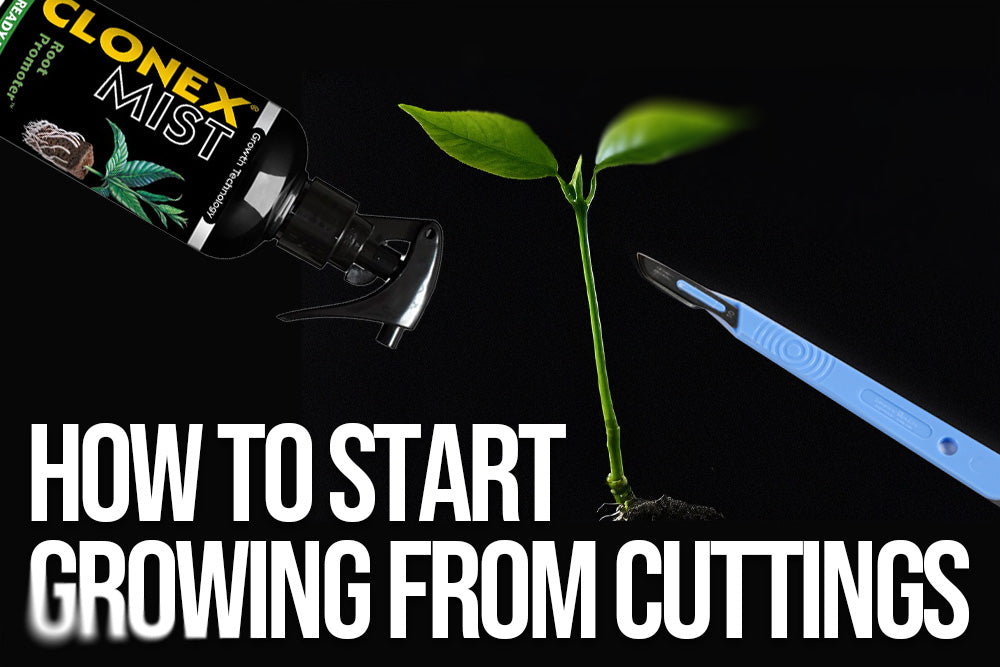
- A sharp scalpel to make nice clean cuts
- Rooting hormone such as Clonex
- A place to root the cuttings at an appropriate temperature
- A spray bottle to mist the cuttings with, keeping the leaf surface moist
- A propagation light such as a compact fluorescent lamp (CFL) or a T5 type of lighting system
Peat plugs need to be soaked in water to make them expand. If you are using rockwool plugs or peat plugs, it is a good idea to soak them overnight in water that has been pH adjusted to around 5.5 - 6.0. For soil plugs, a higher pH of about 6.5 is about right.
Excess moisture should be gently squeezed out of the plugs so that they are not dripping wet. Squeezing or shaking out the excess moisture draws oxygen into the plug which makes a big difference in helping to keep the cutting healthy. Fleximix plugs are ready moistened to the perfect level and do not need to be soaked or squeezed. They are very convenient and ready to use straight out of the packet.
To take a cutting, select a side-shoot on the mother plant. Generally speaking the thicker the stem the better. Ideally, the stem should be around 3mm across or wider. Most growers will take cuttings that have the top leaves and a second set of leaves lower down. Using a sharp sterile scalpel, cut the side-shoot between the second and third sets of leaves. This cut end should be immediately dipped into a rooting product such as Clonex. This will help to seal the wound and rooting products usually contain a hormone, which will encourage the cut end to produce roots.
Some growers cut about the end half of the larger, lower leaves. Doing this does do that job, and it also reduces the amount of space that the cutting takes up. This is handy to help keep cuttings apart and not encroaching on each others space inside the propagator. However, it does create a wound which can be vulnerable to infections. Try it with and without cutting the leaves and see which method works best for you.
Once the cutting has been taken and dipped, it can then be either transferred into a propagation plug or placed into a neoprene ring and then placed into aeroponic propagator. Clonex Mist can help speed up the rooting process and the success rate.
The cuttings will respond best in a mild environment. Around 20C-25C is about right for most species of plant. If the cuttings are too cool, then their metabolism will slow down and they will take longer to root. As mentioned before, in this case it would be worthwhile getting a heated propagator to keep the cuttings at the right temperature.
Lighting for Cuttings
A suitable propagation light should be hung over the propagator. Cuttings cannot handle intense light so a traditional HPS or MH light will almost certainly be too much for them unless used at a great height. A compact fluorescent light or CFL installed in a reflector will work fine. Even better than that is a fixture that uses T5 tubes such as a Maxibright LightWave unit.
Recently, LED strip lights designed for propagation (like the excellent Street Light) have come onto the market and they do an even better job. If you plan on taking a lot of cuttings, they are well worth the investment. For fluorescent lights, they should be hung over the propagator at a fair height, around 18 inches or so for the first few days.
After this the light height can be very gradually reduced. If the light is too low to begin with then the intensity will be too high and the delicate cuttings will suffer. T-LED propagation lights are usually designed to be placed close to the top or even directly on top of the propagation lid.
Always bear in mind that once separated from the mother plant, the cuttings are delicate and quite vulnerable. A low-level, constant light with a preferably wide spectrum is ideal to keep them alive while they begin to think about growing some roots.
As long as the temperature is about right, the propagator lid is on, and the cuttings are getting light then the rest of the process is a little bit of a waiting game. However, the propagator lid should be taken off once or twice a day to refresh the air and the cuttings should be misted with water (or even better - Clone Start from CX Hydroponics before replacing the lid again.
Clone Start is a ready to use spray which is a mild nutrient. It gently feeds the cuttings just enough to get them through until they have produced roots which they can feed with. Misting with Clone Start or Clonex Mist can improve the rooting success rate by a significant margin.
While the propagator lid is on and the vents are closed, the humidity inside the propagator will be at, or very close to, 100%. While the humidity is high, the cuttings will retain pretty much all their moisture, but this reduces the incentive for the cuttings to sprout roots.
Opening the vents now and again will reduce the humidity somewhat for a period of time. So, after 2-3 days in the propagator, open the vents for an hour once or twice a day. The cuttings will sense the short reduction in humidity because of slight water loss through the leaves and they will be spurred on to grow roots, so they will be able to access moisture from their newly grown root zone.
It is important to make sure that the cuttings do not dry out so much that they begin to wilt. This is why it is sensible, initially, to only have the vents open for a short time, and only once or twice a day.
If they become overly dehydrated, then the cuttings should be misted and the propagator lid placed over them with all the vents shut. In many cases, this will allow the cuttings to absorb enough water through their leaves to allow them to bounce back. If all goes well, though, the vents can be opened for a longer time period and more frequently.
The length of time that it takes for cuttings to root can vary a lot. Some of the factors that will affect the rooting time are the strain of plant, the health of the mother plant when the cuttings were taken, and how good the environment is that the cuttings are being kept in. In general, it will usually take somewhere between 7 and 20 days. One tip that we hear a lot from experienced growers is never lift the cuttings out of the plugs to see if there are roots coming out of the stem yet!
Once roots are showing on the outside of the plugs, or protruding out of the net pot an aeroponic propagator the cuttings can be transferred into their intended destination, whether that be a pot of soil, coco, clay pebbles or into a larger rockwool cube to ready them for an NFT system. It is important to introduce feed gradually to newly rooted cuttings. A great product to get them off to a good start is Root!t First Feed. However, once they are on their way, they can be fed with your usual feed. Just remember to start off gently!