Bend it, Shape it, Any way you want it!
The humble Euro Reflector, also known as the "barn-type" reflector is an old stalwart of growing equipment. This is due in no small way to its price. When a reflector can be had for less than £20.00, you can bet its going to be the go-to choice for first time growers and people setting up with a tight budget.
The Euro-type reflector is made by various manufacturers. However, they all bear certain characteristics in common and they are about as basic as a reflector can be made. There is an L-shaped rigid metal backbone which runs down the centre which incorporates 2 prise-up hanging eyelets. The vertical part of the L-shape has the lamp-holder attached. The reflecting metal sheet is attached to the horizontal part of the L-shaped backbone and each side usually has 2 or 3 angled bends which create the concave shape.
The reflector metal is fairly thin (to keep costs down) and is usually dimpled to increase light scatter and to help reduce hotspots. The reflectivity of the material is not as high as with higher quality reflectors, but it is still far better to use any reflector than none at all. Some more recent versions of the Euro reflector also have a V-shape rail above where the lamp sits which stops the light that's going vertically upwards from being reflected straight back down through the lamp again. As a result, this addition improves efficiency and light spread.
Because the reflecting material is thin it can quite easily be bent by hand. This means it is actually customisable to some extent. However, debate rages about whether the wings on a Euro reflector should be bent upwards, bent downwards or just left as they came.
Today we take a close look at the footprints and compare these 3 common ways of using a Euro reflector.
For this test, we hung the reflector so that the bottom of the lamp was 600mm (24 inches) above out test area. The light intensity footprint was recorded using our Li-Cor PAR meter over a 1.5 metre square area. The measurements taken were in µmols/m2/sec.
1) Using it "As it Comes"
A lot of growers do not bend their Euro reflector at all. They simply hang it exactly as it came out of the box, thinking logically that it must have been designed and made that shape for a reason.
Using a Euro Reflector "as is" could not be simpler. Just prise up the eyelets and hang the reflector over the centre of your grow-space. Then you screw your lamp (in this case a Sylvania Grolux 600w HPS) into the holder tightly, plug the power cable into your ballast and off you go.
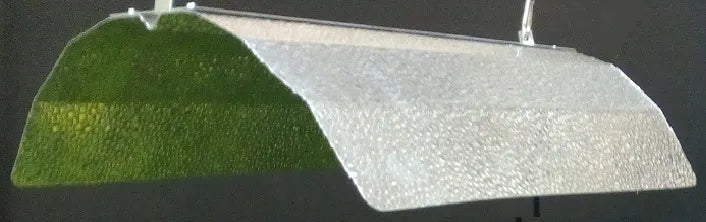
We recorded the footprint that this produces with the height set at 600mm (24 inches) above our test area. The picture of the reflector shows the orientation of it over the test area. This is what the footprint looks like:
The picture of the Euro reflector above the chart shows the orientation of the reflector as it relates to the footprint chart. The top-right of the surface diagram is the lamp-holder end of the reflector. The bottom-left is the other open end. Both the top-left and bottom-right is the area beneath the wings. As you can see, the coverage is better from the front to back axis than the side-to-side axis. While the evenness of the coverage is not all that great, it is doing a fair job for an inexpensive reflector. Bear in mind that we used a 600w lamp which would not usually be used for a 1.5 metre square area, as a consequence the perimeter of the chart above is not receiving a huge amount of light.
Next we bent the wings down somewhat:
We went through the process of testing the footprint again. Here is the result:
You might think that with the wings bent down that the footprint might be narrower too. However, this is not the case. The footprint is not just a lot more even, the light intensity thrown towards the sides of the area is greater too. This is because light hitting the left wing of the reflector is being thrown towards the right of the test area and vice versa. For most growers, this is a much better footprint than when the wings are left "as is".
3) Using it with the wings bent up
Next we bent the wings upwards making the reflector somewhat flatter:
We have heard that many growers use a Euro reflector with the wings bent up. Many bend the wings up so far that the reflector is almost completely flat. We didn't go that far, but we did bend them enough for it to make a difference. Here is the resulting footprint:
Straight away we can see that the light intensity in the centre (directly beneath the lamp) is lower than with the other 2 wing positions. While the intensity at the sides is better than with the "as is" position, the chart shows a greater area of blue (very low intensity) in the corners. While testing the euro reflector with the wings bent up, we could see that quite a bit of light was being lost horizontally out to sides and not down onto the test area. In actual fact, this could be an advantage where several lights are being used in a multi-light grow area. The overlapping of light coming from different directions means plants will be getting light from more sides.
Conclusions
Although the differences between the wing positions are fairly small, they are still significant. For a single light grow, the most even footprint is definitely achieved with the wings bent down. For a multi-light grow, it is possible that the bent up position will produce the best results.
Overall, we would say that Euro reflectors do a fair job for their price. How you choose to use it is really up to you and the set-up you will be using it in. However, it is a very basic design and we would strongly recommend that you upgrade to a higher quality reflector when funds are available. Upgrading will give you more reflectivity, a better footprint and will give you increased yields.