How to Train Your Plants for Increased Yield

There are all sorts of products out there that can help to increase your crop size, but one of the biggest yield increases isn't a liquid or powder, it's shaping your plants to make the most of the light from your grow lamp.
There are several techniques that can be used to train your plants for increased yield, but before we go into those it's a good idea to have a clear vision of what you want to achieve.
The intensity of the light from a grow lamp goes down the further you get away from it. This law follows something called the "Inverse Square Law" (read our blog about that and your Light Height Here).
So, in a nutshell, what we want to do is create is a nice, flat (or a slightly concave dish) canopy which uses the entire area of the grow space, and where the tops of the plants are getting close to the maximum amount of light that they can handle without it causing any heat or light bleaching issues. This optimal distance between the lamp and the plant-tops will vary with different wattages of lamp and also according to the particular reflector being used. If the tops of the plant are getting the optimal amount of light then the grow light is as low as it ought to be. The slightly lower parts of the plants will be getting as much light as is they can. Generally speaking, more light equals more yield.
Left to their own devices, many types of indoor plant grow in a sort of Christmas tree shape. The top of the plant grows vertically and side-shoots grow out and then upwards. The exact structure will vary somewhat from plant to plant. Some plants naturally produce a lot of side-shoots, and others produce hardly any. The good news is that with judicious training almost any plant can be coaxed into creating a high-yield producing flat canopy. This is best done during the vegetative stage so that the plants are already "shaped" as they enter the flowering stage.
So, let's take a look at the different methods of plant training and products which can help us achieve greater yields:
1) Topping
The highest part of a plant is called the "apical tip" and it exerts the phenomenon of "apical dominance". The apical tip produces a hormone called auxin which is delivered downwards to the rest of the plant. Auxin inhibits growth. So, while the tip keeps growing upwards, the growth of side shoots is slowed down. This maintains the Christmas tree-like growth pattern and ensures that the plant keeps growing upwards. This is an important survival technique in scenarios where plants are always trying to out-compete their close-by neighbours for canopy space where the sunlight is most plentiful.
In order to create a flat canopy, we want those side-shoots to grow up to the same level as the apical tip. By snipping off the top of the apical tip - an inch or two is plenty - the auxin stops being produced. This is called topping. It has the dual effect of slowing down the vertical growth of the tip as well as allowing side-shoots to grow out and then upwards. Quite often, two or more new tips will grow from just below the site of the cut tip.
Always use clean snippers to make the cut to reduce the chance of infections getting in. Some growers even put some Vaseline over the wound.
When the plant has recovered and is beginning to grow normally again, it may be the case that the side-shoots will not have caught-up with the top of the plant. In this case it may be necessary to top the two or more new tips in order to give the side-shoots more time to reach the same height.
2) LST or "Stem Bending"
Cutting off the tip of a plant causes a stress response to the damage. This can even cause growth to stall briefly. However, topping is still one of the most effective way to encourage side-shoot growth.
Many growers like to keep topping down to a bare minimum and use a different method of training which is called Low Stress Training, or LST for short.
LST is basically bending stems over in order to expose more parts of the plant to light. For example, if a main stem is bent over then the small side-shoots on it will receive much more light than if left in the shade. Usually, the bent over stem is tied, or fixed in place. Products such as soft plant ties, twisty-ties, yo-yos and bendz can help a lot with fixing the bent stems in place. Good stem bending can produce the same result but caused much less stress to the plant. Therefore, it reduces the length and severity of any growth stall probably down to zero.
Because of the reduced stress response, stem bending became known as LST, or "Low Stress Training". When done correctly it can give most of the advantages of topping but it does not produce the growth stall. Neither does it create an open wound in the plant where diseases might enter. It is important to be very gentle when stem bending. It is also important to fix the bent branch in place with one of the products below, otherwise the stem or branch will find its way back to its original position within a day or two.
There is a high stress training technique like stem bending called "Supercropping". This where stems are bent over and slightly damaged internally. The idea is not to actually break the stem but to create a "knee". As the stem is bent over the grower will feel a slight cracking of the inside of the stem. The outside of the stem should remain undamaged. The stem will generally stay bent over without any help but you may need to tie it down if it springs back up in the following days. It is a good idea to not supercrop thick or woody stems as they are likely to snap. It's also a good idea to keep some duct tape to hand to wrap around any accidental breaks on the outside of the stem.
3) Using "Bendz" or "Yo-yos"

These are great to help with stem bending and supercropping, or just to get side shoots to grow in a slightly different direction. Bendz are small clips which a plant stem can be fitted into. They are in the shape of a quarter-circle and can be used to bend a stem over at right angles. This can help you shape lower branches so that they get more light.
Likewise, yo-yos are products which can help train a plant in a particular way. Consisting of a sprung reel of nylon with a clip on the end, they can be hooked around a plant stem and the other end attached to a tent pole or other fixture. This puts some tension on the stem which bends it over in the direction of the yo-yo and helps to "open-out" the plant. Towards the end of flowering/fruiting, yo-yos can be used to provide some support to branches bearing heavy fruits.
4) Trellises and Bamboo Stakes
Cage trellises are funnel-shaped wire frame supports which allow the grower to train side-shoots through, around and up the frame. Again, plant-ties help to keep things in place. Bamboo stakes can be made to do a similar job as a trellis.

5) Support Nets
Support nets, sometimes known as scrog (screen of green) nets are horizontal grids with large (3" or so) spaces. These tend to go hand in hand with other training techniques. The plant is topped regularly or bent until all the spaces are occupied by a side-shoot. This ensures that the canopy is full & flat with evenly-spaced "heads". This gives each shoot a similar amount of space to grow and capture light.
6) Lollipopping
At first glance, lollipopping seems like a pretty brutal trimming technique. However, when it is performed correctly it can make a startling difference to the size of a crop. The basic idea is that lower branches do not receive enough light to produce a worthwhile amount of flowers or fruit. This negatively affects the quality and size of the fruits / flowers that grow lower down. As flowering begins or just after almost all of the lower growth is removed. The plants' energy is diverted to increasing the fruit / flower production at the top of the plant where there is plenty of light. Yield can be greatly increased with this technique. As a bonus, the airflow around the bottom of the plant is improved and the risk of mould lurking around in the lower foliage is greatly reduced.
Combined with regular topping, stem bending and a scrog net, this is one of the most effective methods of increasing yields.
Putting it All Together
While trellises, bendz and yo-yos have their place and their uses, the real game-changer is a combination of topping/LST, scrog netting and lollipopping. These 3 things combined seem to be the biggest yield-increasers. so let's just take a look at how to implement them for best effect.
None of these techniques & products are applied to the roots. This means the above combo can be put into practise for pretty much any type of grow system - pot, nft, flood & drain, dripper etc. While a large healthy root-mass is absolutely key to big yields, the techniques and products to achieve a great root system are the subject of other articles.
First of all, cuttings or seedlings should be grown to the point that they are established and are becoming vegging plants. This usually means a few nodes. The plants are then transferred to their intended destination. This might be a larger pot or a hydroponic grow system. Once in there, it is best to give the plants a few days to recover from transplant stress and to get their roots beginning to grow into the fresh space.
Once plants have got themselves established in their new home, it is time to begin the training. For the purposes of this article we will choose to top the plant. Although this causes a bit of stress to the plant, the results are little more predictable. Over the course of the next few days the side-shoots will begin to grow and quite often two new apical tips will develop. As the side-shoots extend, they should be trained using appropriate support products mentioned above.
After a few days has passed, it will probably become necessary to top the apical tips again to allow the side-shoots to reach the same level as them. Continue to train the side-shoots to create a full, wide, even canopy which fills the grow-space. It will be about this time that you will want to trigger flowering. Now is time to start using a scrog net.
Place the net right above the plants and gently feed the heads through the gaps so that at least one head goes through each of the gaps above the plant. The net keeps the heads separated out so that they all get their fair share of light and air movement. The heads can be gently tied in place if necessary. With flowering/fruiting initiated, the plants will stretch above the net over the next few days.
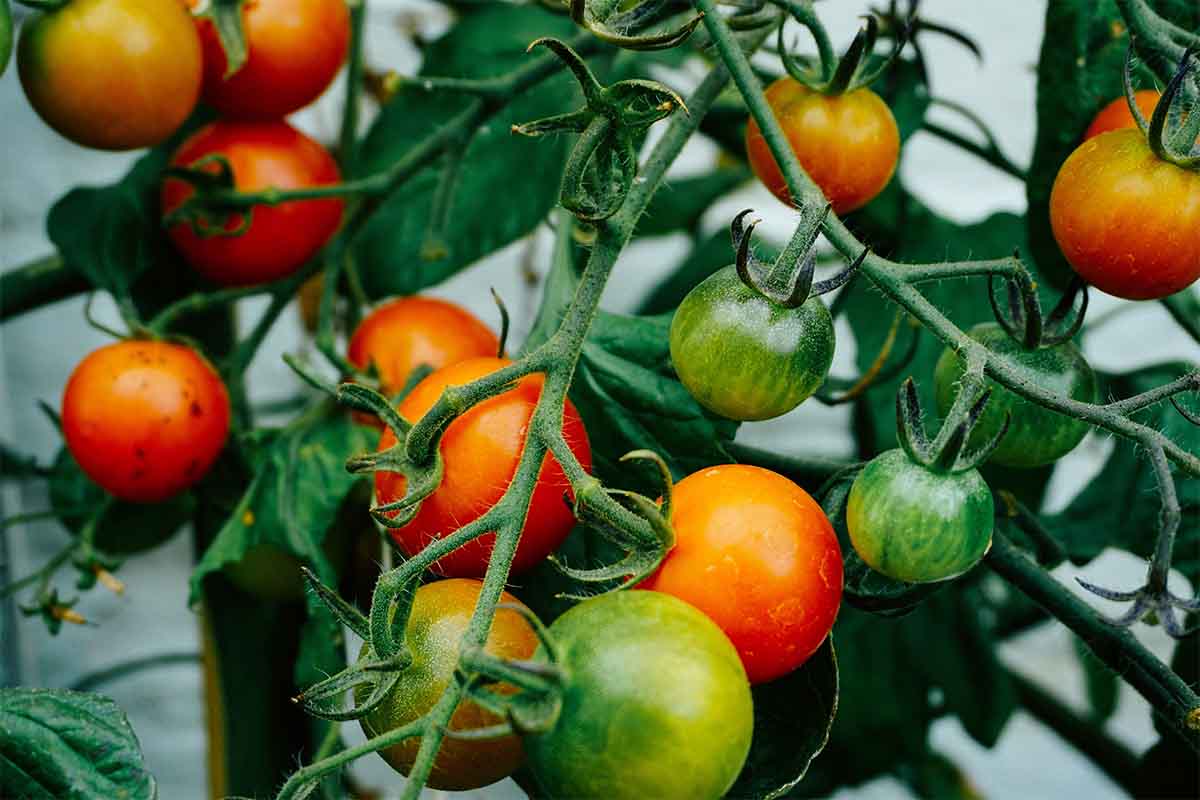
As soon as the very first flowers or fruits appear it is time to put supercropping into practice. Notice that with the tomato plant above, all the growth on the bottom half of the plant is removed. If the plants are particularly short then trimming off just the bottom third will do. Supercropping seems quite a drastic thing to be doing, but the bottom parts of a plant rarely produce much fruit and it tends to be of much lower quality. Supercropping ensures that the top parts of the plant produce as much of the higher quality fruits as possible.
Gain Experience
As time goes by, growers will get better at knowing when and how to apply the concepts. Getting to know your plant and how it grows makes a big difference. If you can keep a certain plant/strain going by keeping a mother and practicing on clones taken from it then after a few grow you will probably master how to get the most from it. Keep practising and you will almost certainly be surprised at how much more yield you will get.